There is a vast array of skills in play during an on-court basketball game. From dribbling to running and rebounding, all of these are vital aspects that your team needs to remain competitive. But as any great coach and player understand, a terrific shooting skill set is by far the most important trait for your players.

Top pure shooters in NBA history (picture Stephen Curry, Klay Thompson, and Ray Allen) may seem to have been born that way. But that’s a misconception: pure shooters are created through a series of repetitive basketball shooting drills. We’ve rounded up some of the best drills, tips, and tricks in this post.
What are Three Types of Shots in Basketball?
When building your basketball team shooting drills, it pays to understand the different types of shooting in basketball first. This is because your players require particular basketball shooting training drills to perfect each shot.
Lay Up
This is a 2-point short-range shot involving dribbling towards the goal and then laying the ball into the hoop by bouncing it off the backboard. This strategy is considered the most basic type of shot, and it’s taught in most basketball shooting drills for kids and youths. Its purpose is to create space, shoot the ball from a different spot, and use alternate hands when shooting.
Alley Oop
This is an advanced offensive shot in which one player jumps to receive the ball in midair and immediately slam dunks it before landing.
Hook Shot
This attempt requires the offensive player to turn his/her back towards the basket and then swing the ball towards the basket in an upward arc so that the ball goes over the head in a hook-like motion. The nature of this activity makes it one of the hardest types of shots in the game. But your players can perfect it by regularly trying it out in their basketball workouts & drills.
Get your BlazePod®
SHOP NOWBasketball Shooting Drills
1. Elbow Shooting Drill
This is among other pass-and-shoot basketball drills that focus on giving your team effective footwork. This practice will help your players develop balanced, smooth, and consistent shot motions while moving towards the goal from both directions.
Drill Set Up and Execution
- Divide your team into 3 small groups; one group will be the shooters, and the other two will be the passers.
- Ask the shooters to queue at the half-court line. The passing teams should stand directly opposite each other on the right and left-wing and close to the elbows.
- To start, the first shooter runs towards the left elbow and receives the ball from the first passer from that side. On receiving the ball, the first shooter proceeds to shoot.
- Immediately after passing the ball, the first passer runs to join the shooters. After shooting, the initial shooter throws the ball to the second passer to the left and joins the passing line.
- Next, the second shooter runs towards the right elbow, where he/she receives the ball from the first passer from the right side of the wing. The shooter takes the shot and joins the passers to the right after passing the ball to the next player.
- The drill continues until all the players have made 10 shots from both elbows.
During these basketball drills for practice, encourage your players to move at game speed. Also, guide the shooters to land either in the same spot from which they began the shot or just slightly in front.
2. Pressure Jump Shots Basketball Drills
Jump shots may be among other easy basketball shooting drills for intermediate and advanced players. But they save the day in multiple situations during the game. That’s why they are a requisite for great players.
Now, although typically simple, jump shots require more power and energy because they involve vertical movements. Secondly, the pressure around the player may cause them to be short on shots leading to a miss. That’s where the need for these pressure jump shot drills comes in.
These are great shooting drills for basketball that add game-like pressure to your exercises. The benefits are fairly obvious: they train your players to make excellent jump shots even when under pressure. This activity also teaches your players how to pass the ball for a jump shot and bring different types of passes to a shooting position.
Drill Set Up and Execution
- Divide the groups into pairs.
- Player 1 stands under the basket with a ball. Player 2 within a shooting range.
- At the coach’s cue, player 1 passes the ball to player 2. Almost immediately, player 1 charges at player 1 to defend against the jump shot.
- Player 2 focuses on bringing the ball to a proper shooting position and attempts to make the jump shot.
- Player 1 should not try to block the shot; instead, he/she tries to distract player 2 by shouting or waving hands. After the shot has been made, player 1 blocks player 2 until the basketball hits the floor.
- The pair makes 10 reps alternating from offense and defense.
During these basketball drills shooting under pressure, encourage the players to make proper chest, bounce, and overhead passes. Also, let the players train how to receive passes that are slightly off their spot to mimic bad passes.
3. Shooting Basketball Drill
These are basketball 3 point shooting drills that aim to make the players move at game speed and take game-like shots during practice. By simulating on-court scenarios in your workouts, these drills will condition your players, giving them a relatively easier time in the game environment. The objective of these intense basketball shooting drills is to get the players to make 21 3-pointers within a preset amount of time.
Drill Set Up and Execution
- The coach, trainer, or another player starts by setting a timer for 2 minutes (adjust if necessary).
- On the coach’s call, the player starts by sprinting from the sideline to the wing. They catch the ball and shoot a 3-pointer.
- After taking the shot, the player sprints to the sideline and then to the wing again for another shot.
- The player repeats this until they have completed seven 3-pointers from that wing.
- Next, the player moves to the top of the key, where they repeat the same pattern. But instead of sprinting to the sideline, they sprint to the central line.
- After making seven 3-pointers from the top of the paint, the player moves to the other wing and completes another set of seven 3-pointers.
During these activities, encourage the players to move at game speed and complete all 21 three-pointers within the set time. You may also consider recording the players’ attempts and successful shots for comparison during the next workout session.
4. Speed Shooting Drills
This is a good workout activity to include in your basketball dribbling drills. This is a multi-purpose exercise that focuses on your players’ acceleration, deceleration, balance, and the ability to make a well-balanced attempt while fatigued. The major benefit of these basketball shooting dribbling drills is that they develop your team’s shooting form and techniques. It can be viewed as a form of conditioning too.
Drill Set Up and Execution
- Start by splitting the team into 3 groups of 3-4 players.
- Let the 3 groups stand evenly spread out along the baseline. Each group should have a ball.
- On the coach’s signal, the first player from each group sprints and dribbles towards the other goal.
- From either the mid-range or 3-point line, the players pull up and attempt a shot.
- After shooting, each player rebounds their shot and sprints to the other end of the court, and then pulls up and shoots.
- Again, the players rebound their shot and pass the ball to the next player on their line.
- The pattern continues until when the first team reaches a predetermined number of wins.
5. Left to Right Shooting Drills for Youth Basketball Players
This is another activity that you should consider adding to your team’s basketball passing drills. It’s ideal for players of all ages, and it seeks to develop their jump shot technique. The simplicity of this drill makes it possible for your players to continue trying it in the absence of the coach and even with a basketball hoop at home.
Drill Set Up and Execution
- During set up, player A stands under the net with the ball while player B stands at the left elbow.
- At the coach’s call, player B dashes to the right elbow and receives a pass from player A.
- As fast as possible, player A gets into a shooting position to make the shot.
- After the shot, the players switch roles, so that player A gets under the basketball while player B heads to the left elbow.
To maximize the intended benefits of this drill, ask the players to get into a good shooting position before making the shot. They should keep their knees slightly bent and legs shoulder-width apart and with their eyes on the target. Importantly, the fingers and thumbs of the shooting hand should be at the back of the ball. The non-shooting hand needs to be under the ball.
You can add variations to this drill by having the players move some distance from the net. As they get a good hang of it, the players can also introduce dribbling to the activity.
6. Half Court Shooting Drills- 3v2+1
The 3v2+1 is yet another very interesting and effective basketball passing drills that work on different skills all at once. When added to basketball defense drills, these activities may improve on-ball defense, close-outs, help defense, and contesting shots. When playing offensive, this is a great workout to complement your basketball passing drills, spacing, layups, and shooting techniques. Also, the 3v2+1 involves contesting all shots, which makes it one of the best basketball communication drills.
Get your BlazePod®
SHOP NOWDrill Set Up and Execution
- This drill is played in a half-court and requires 6 players at a time.
- Three players (1, 2, and 3) will be playing offense. They stand evenly spread out outside the 3-point line. The other three players (x1, x2, and x3) play defense and stay inside the arc. Each of the defense players matches their respective offense players.
- To start, the coach passes a ball to any of the offense players (1, 2, or 3). Whoever the coach passes the ball to, the respective defense player must get at least 2ft outside the arc before trying to defend. For instance, if the ball is passed to player 1, player x1 must get outside the 3-point line by at least 2ft to start defending.
- The teams can switch roles after making the predetermined shots and defensive stops.
Having one defender move outside the arc, you create a temporal 3v2 scenario giving the offense players a momentary advantage. This forces players on both sides to employ different passing, communication, decision making, and shooting skills to gain or maintain their competitive edge.
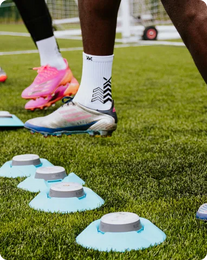
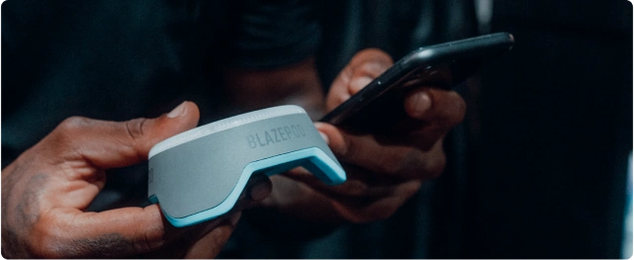
If you’re looking to increase your team’s shooting percentage, you’ll want to look beyond typical basketball shooting contest ideas. The Blazepod flash lighting system is designed to bring randomness to your basketball drills by adding an aspect of time and training your players for reflexes, coordination, and fitness.
As most coaches and trainers will attest, this flash reflex training kit will also come in handy in sharpening your players’ focus and how fast they react to the ever-changing conditions in the court.


